Types of Lights & Modifiers
Strobe - A strobe light or stroboscopic lamp, commonly called a strobe, is a device used to produce regular flashes of light.
Tungsten (Hot Lights) - Continuous but get hot
Florescent - Street Lights and Classroom Lights are an Example
LED Lights - Stay Cool and are Continuous
Ambient - Existing Light
Light Modifiers
Bounce or Reflector
Scrim - Softens Light
Lightbox - Softens Strobe Lights
Snoot - Creates a Spotlight
Barn Doors - Control direction of light
Flags - Control Spill Over so Light is not Going all over Room.
Types of Lighting
1. Ambient light -
Ambient light is defined as lighting that is not added to the scene by the photographer. Sunlight can be ambient lighting, but so can a streetlight, and don’t forget about moonlight. None of these are added to the scene by a photographer.
The goal with ambient lighting is often to get a soft, evenly distributed light that can bounce from one surface to another. This kind of lighting works particularly well for landscape photography.
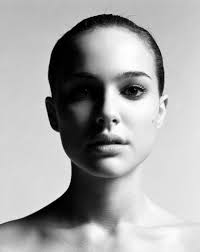
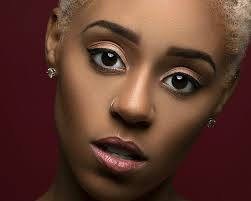
2. Flat Lighting
Flat lighting is when you have the light source facing directly onto the front of your subject. If you’re photographing a person, it will mean that their face is well lit, and that you won’t see any shadows on their face.
Shadows tend to draw out imperfections, and so, this is a great technique to use if your subject has acne, other blemishes or wrinkles. It’s not normally preferred as a lighting technique for portraiture photography since shadows bring the face to life, but with a subject who is self-conscious of their skin imperfections, this would be the way to go
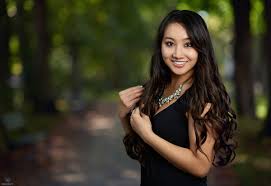
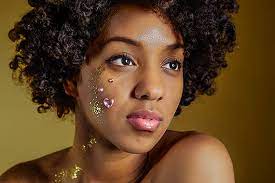
3. Broad Light
Broad lighting is actually a type of side lighting. It’s where the most well-lit side of your subject is facing the camera, and the less well-lit side is away from the camera. If we’re talking about a subject’s face, this type of lighting can work well for a person with a narrow face since it makes the face look fuller. It would be less desirable, however, if the subject already has a full face. Broad lighting is also a technique that gives more contrast to the image than other types of lighting. To set this up, you simply place your light source at a forty five degree angle from your subject, and then have your subject turn away from the main light source until you achieve the desired effect.
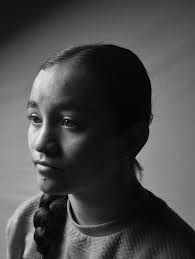
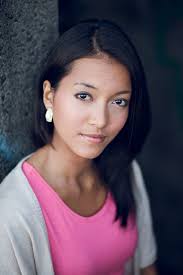
4. Short light
Short lighting is the opposite of broad lighting. This is where the shadow falls on the side of the face closest to the camera. This technique is flattering to most facial types, but in particular, it works well to make a full face look thinner. Short lighting is ideal for low-key images, in part because of the heavy contrast it provides. It’s also good if you’re trying to create images with more depth, and it can be used to hide imperfections. The set up for this is similar to that for broad lighting. You start with the light source positioned at a forty five degree angle from your subject. But, unlike with broad lighting, this time you have your subject turn toward the light–you want the brightest part of your subject’s face to be the short side.
Short lighting is the opposite of broad lighting. This is where the shadow falls on the side of the face closest to the camera. This technique is flattering to most facial types, but in particular, it works well to make a full face look thinner. Short lighting is ideal for low-key images, in part because of the heavy contrast it provides. It’s also good if you’re trying to create images with more depth, and it can be used to hide imperfections. The set up for this is similar to that for broad lighting. You start with the light source positioned at a forty five degree angle from your subject. But, unlike with broad lighting, this time you have your subject turn toward the light–you want the brightest part of your subject’s face to be the short side.
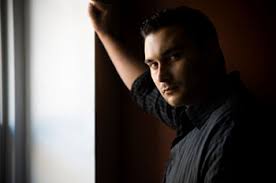
5. Split light -
Split lighting is where the light source hits the subject from the side at a ninety degree angle. It creates a split of light and shadow–half of your subject will be in the light and half will be in the shadow.
This technique tends to create more dramatic images. It often makes your subject appear tough and more masculine. This type of lighting also tends to emphasize the texture of the skin and the details of the face. It gives a sense of assertiveness and can also be used to emphasize glamour.
It’s quite easy to set this up. You simply put the light source at a ninety degree angle to the direction your camera is shooting, and it should be hitting your subject on their side. It also helps if the light is slightly behind the subject. Then you can move your subject around until you get a ‘split’ of the light–half of your subject lit and the other half in shadows.
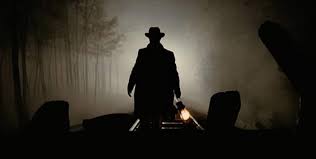
6. Backlighting
Backlighting is just what it sounds like–the light source is behind your subject. It can be used to create silhouettes, or you can combine it with certain atmospheric conditions–like fog–to get more dramatic images.
One of the problems with this lighting technique is that you can lose clarity in your subject because it is backlit. For that reason, it might help to use reflectors to reflect some of the light back onto your subject (if you don’t want a silhouette), or you can use a technique called the semi-silhouette where you only allow the light to just barely enter the frame. That creates a nice glow that is a welcome contrast to the dark background.
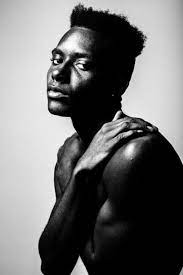
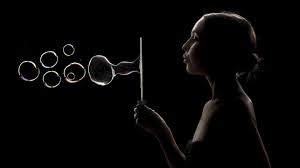
7. Rim light -
Rim lighting is where the light hits the subject at an angle, such that it creates highlights along the edges of your subject. This highlights the shape of your subject and it’s a great technique to use to separate your subject from the background.
You can create this in the studio with a single light source positioned behind your subject. Then, have your subject turn until the light creates a rim highlight along the edges.
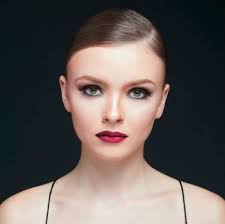
8. Butterfly light -
This technique is named for the distinctive shadow it creates below the nose of your subject. You set this up by placing the light in front of and above your subject. It will create a small butterfly-shaped shadow under their nose.
On the plus side, it highlights prominent cheekbones, which is why many women like it. But, on the negative side, it also emphasizes shadows from deep-set eyes. Thus, you’ll want to take your subject’s unique features into consideration before choosing this technique.
This lighting technique is also referred to as paramount lighting, and it is flattering to most people, making it a favorite for portraiture photography.
9. Loop light -
Loop lighting is another go-to technique for portraiture photography because it is flattering for almost every subject. It is less dramatic than other lighting types, but it creates more depth than flat lighting. It does all of this by still keeping the subject well-lit.
It’s easy to set up–you simply pose your model, and then set the light at a forty five degree angle to your model and slightly above eye level. This creates a loop-shaped shadow–hence the name–under the nose of your subject on the opposite side of their face from the light source.
10. Soft light -
Soft light is light where shadow edges are soft and open, and there is less contrast. It is achieved with a larger, broader light placed closer to the subject. Overcast days are a great opportunity for outdoor soft lighting.
This type of lighting can be achieved by diffusing your artificial light. This can be achieved in the studio by using a full diffusion panel or softbox that is placed between the light source and the subject. Window lighting can also be a great source for softer light.
Soft light is used mostly for portraiture, macro, and nature photography. It can also be used to make a subject appear more youthful.
11. Hard Light -
Hard light is the opposite of soft light–it creates strong shadows and high contrast. It creates more dramatic and edgier images. In the studio, you can position the light source where you would with soft light, but you don’t use diffusers to soften the light.
You can also make the hard light look like a spotlight, and that will increase the shadows in the image. One of the things to keep in mind though, is that not everyone looks good in hard light. It can accentuate skin imperfections and the shadows created by deep set eyes, for example. Thus, you have to consider your model’s unique features before choosing this type of light. All of these types of lighting are great for different reasons. It depends on what kind of mood you’re trying to create as well as the subject you’re photographing. Whatever the image you want to create, light is crucial to creating the mood you want.
Many people think of the photographer as similar to the artist who paints. The difference is that the photographer is painting their portrait with light instead of paint. That’s why an understanding of exactly how to create the looks you want is vital for every photographer.